
Create a packet database sample, generate a connected test design, and run a throughput search from the Web UI. This example uses RFC2544-Example as the model and project name. The wizard creates the RFC2544 Benchmark, two TestPorts, and a Test Project; you do not need to place and connect them manually.
Before starting, connect two available physical traffic ports through the device under test, or directly together for a baseline. Use the ports that match your cabling and confirm both links are ready. The sample provides Ethernet/IPv4/UDP packets; review their addressing and destination MAC behavior for the network being tested.
Create The Packet Database Sample
- Open Models → Validation Models.
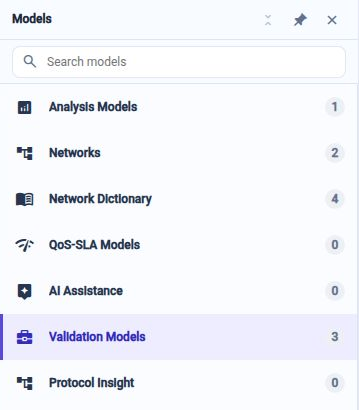
- In Browse, expand Test Traffic Patterns and select Packet Database Traffic.
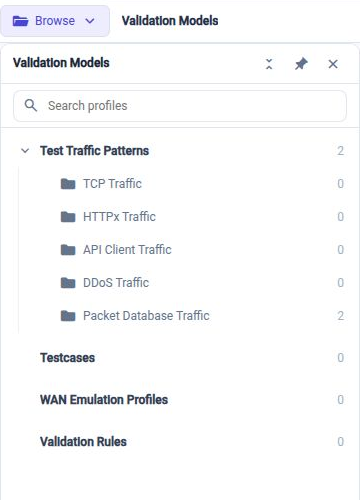
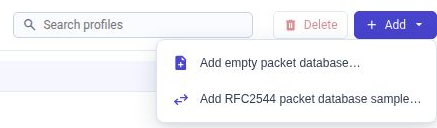
- Open Add and choose Add RFC2544 packet database sample….
- Enter RFC2544-Example in Name. Add a description if needed.
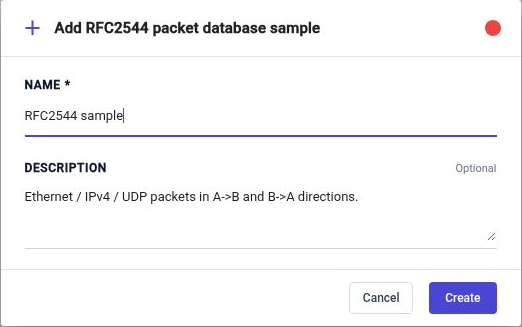
- Click Create. The new packet database opens with the sample's A->B and B->A packet sets, one for each traffic direction.
Create And Attach The Test Service
- In the packet database header, open Test Service.
- Click Create Test Service… to open the guided setup for this packet database.

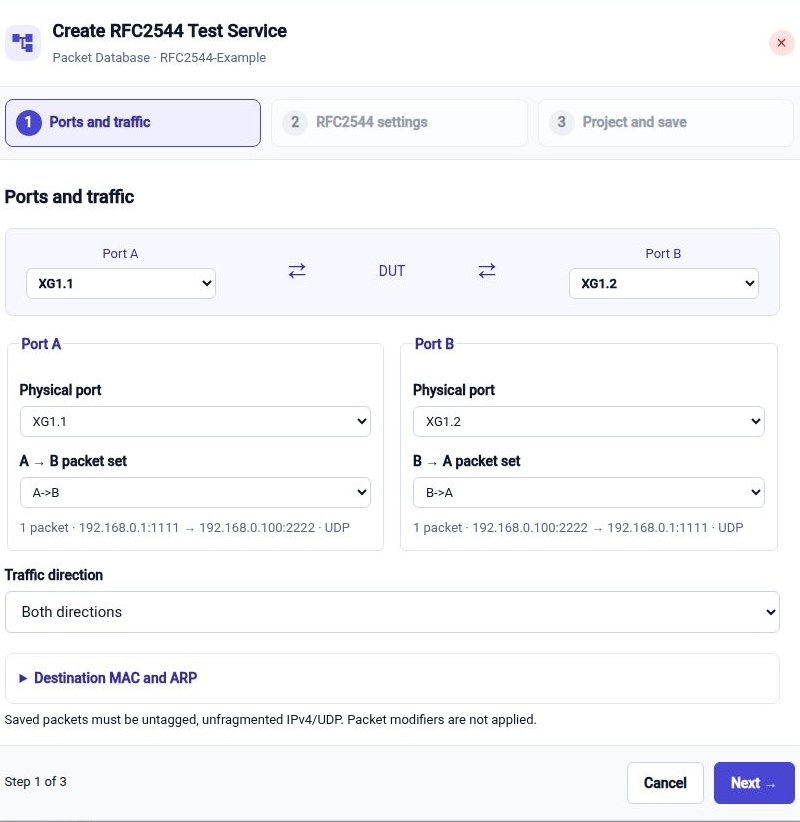
- On Ports and traffic, select distinct physical interfaces for Port A and Port B. For both directions, select the A->B packet set for A → B and B->A for B → A, and leave Traffic direction set to Both directions. Review Destination MAC and ARP if the saved packet addresses do not match your path. Click Next.
- On RFC2544 settings, use the following settings to reproduce this example.
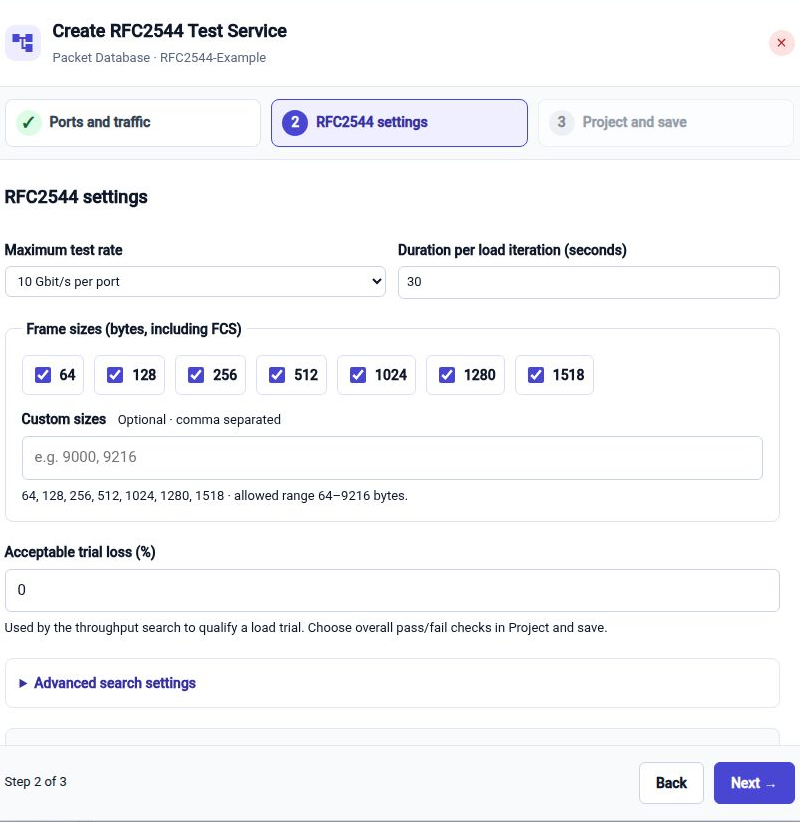
| Setting | Example value |
|---|---|
| Maximum test rate | 10 Gbit/s per port, when supported by the connected path; select 1 Gbit/s per port for a lower-rate baseline. |
| Duration per load iteration (seconds) | 30 |
| Frame sizes (bytes, including FCS) | 64, 128, 256, 512, 1024, 1280, 1518 |
| Custom sizes | Leave empty. |
| Acceptable trial loss (%) | 0 |
| Advanced search settings | Keep the initial settings. |
The duration applies to each load iteration, rather than the entire test. The search tries multiple loads for every selected frame size, with additional time for warm-up and receive drain. Acceptable trial loss determines whether a load trial qualifies during the throughput search; the Validation Rule selected when generating the report provides the separate overall acceptance assessment.
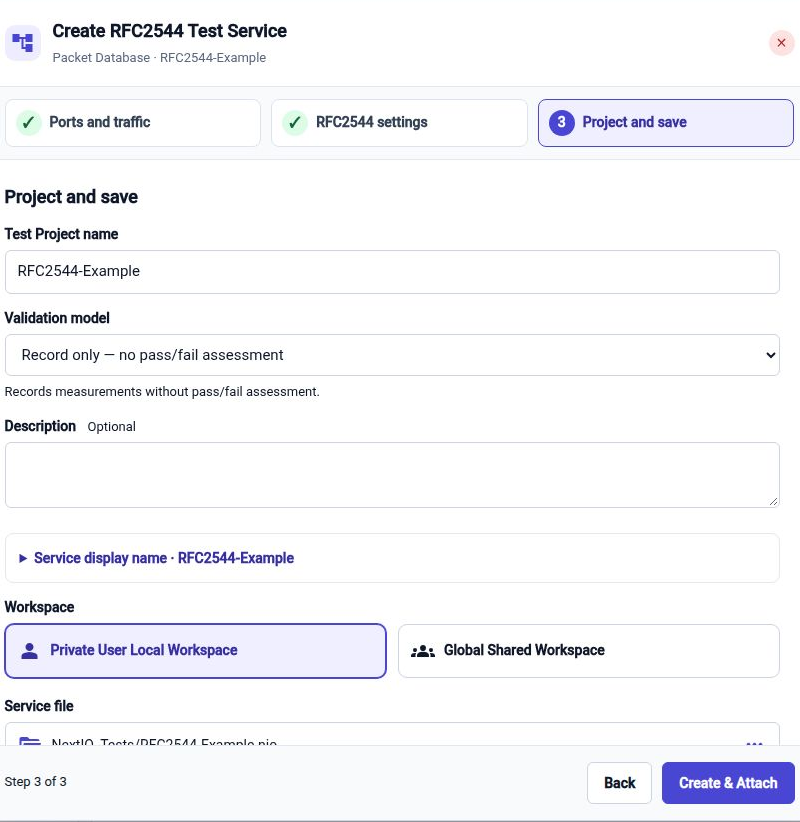
- Click Next to reach Project and save. Keep RFC2544-Example as the Test Project name. Choose a suitable Validation model, or explicitly choose Record only — no pass/fail assessment for a measurement-only baseline. Review the workspace, directory, and filename; the usual private test location is NextIO_Tests/RFC2544-Example.nio. Click Create & Attach. The design is saved and appears in the packet database's associated Test Service list. Creating it does not start traffic.
Open The Diagram And Start
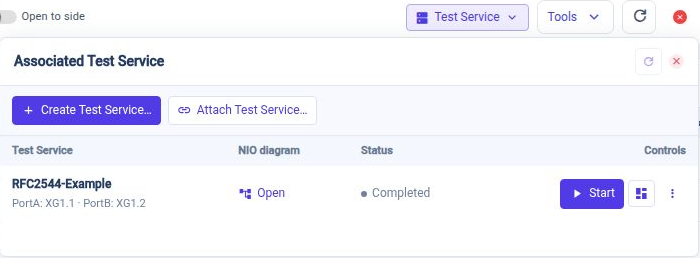
- In the associated service row, choose Open to inspect the generated NIO diagram. You can also choose Start from that row to go directly to the start workflow.
- In the diagram, confirm that RFC2544 connects to PortA and PortB, and that Test_Project_1 contains the project settings. The project has no packet connections. Check that the two TestPorts select the intended physical interfaces.
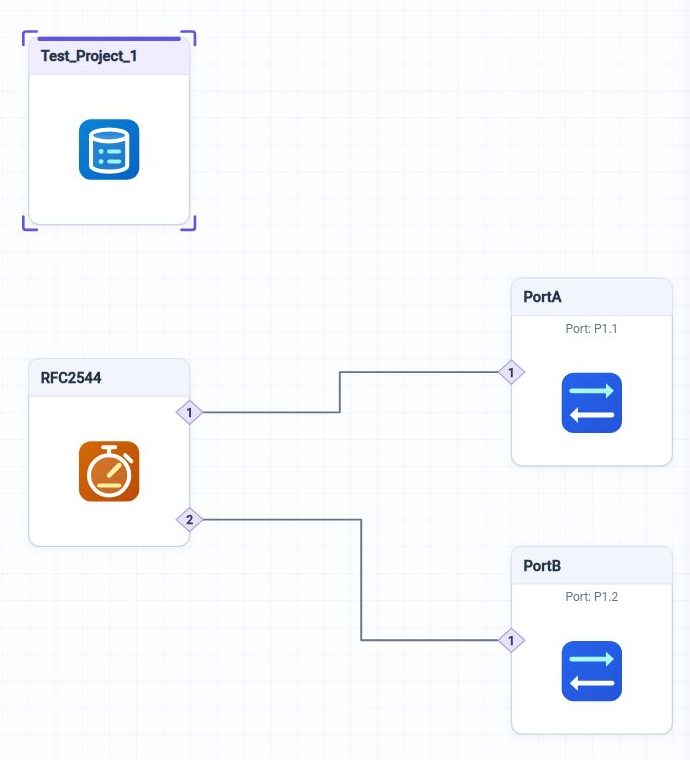
- Click Start in the diagram toolbar.

- Keep the default start settings: the selected service design is the saved RFC2544-Example.nio, Stop when complete is enabled, and Automation is Start manually.
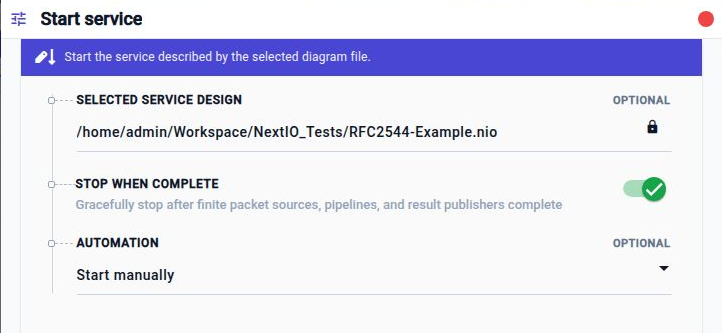
- Click Start service. Allow the workflow to start the benchmark and begin its frame-size and load searches.
View The Running Test And Results
- Return to the diagram and click View Service….
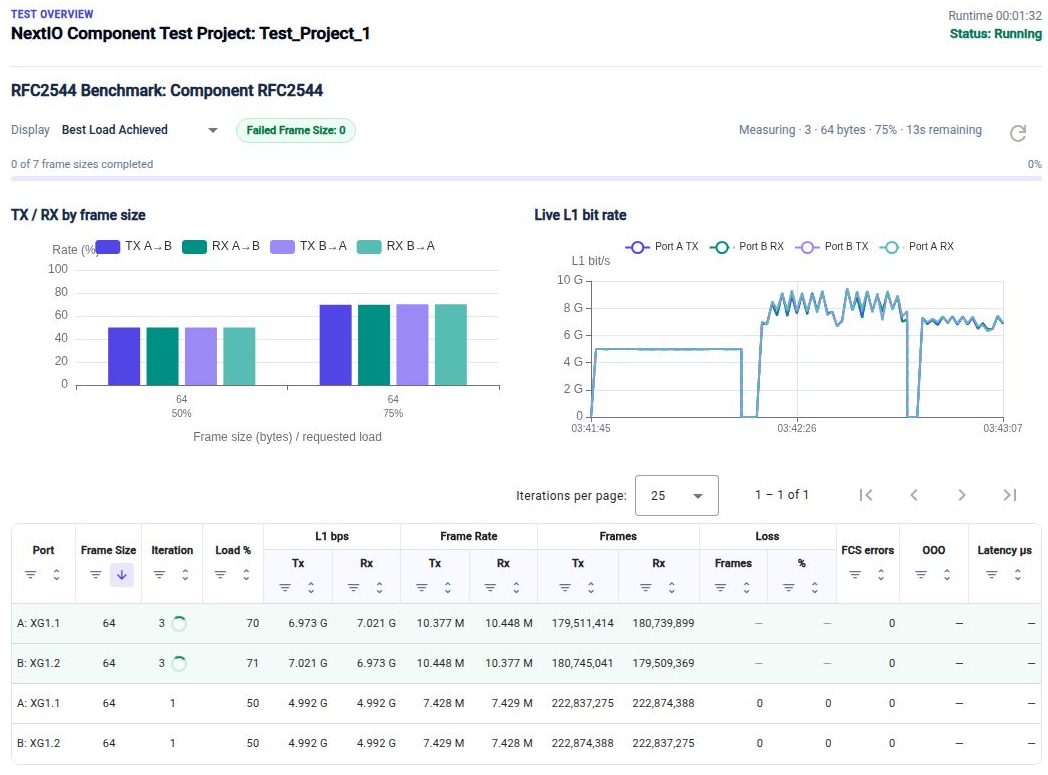
- Select Test Overview in the service catalog. It shows the Test Project runtime and status, the RFC2544 search, charts, trial results, and Test Port Statistics.
| Area | What to review |
|---|---|
| Search status and progress | Current phase, iteration, frame size, requested load, and completed frame-size searches. Frame-size progress is coverage, not a remaining-time estimate. |
| Display | Use Best Load Achieved for the summary and All Iteration to inspect individual trials. |
| TX / RX by frame size | Compare transmit and receive rates for the tested directions and frame sizes. |
| Live L1 bit rate | Watch the two ports' transmit and receive rates over time. |
| Trial results | Inspect Port, Frame Size, Iteration, Load %, L1 bps, Frame Rate, Frames, Loss, FCS errors, OOO, and available Latency measurements. Live loss remains pending until the load and receive drain finish. |
| Test Port Statistics | Check link state, traffic counters, errors, and missed packets alongside the benchmark result. |
Let the finite search finish; Stop when complete then finalizes the service. Review failed frame sizes, measurement validity, and recording completeness before interpreting throughput. A run created with Record only records measurements without an overall pass/fail assessment. Test Project keeps the recording under Test_Results/<device-local timestamp>/test.testdb beside the saved design.
For packet restrictions, search controls, and result interpretation, see the RFC2544 Benchmark guide.
Continue with Validation and Report to create a rule set, assess the finalized recording, and open the generated report.